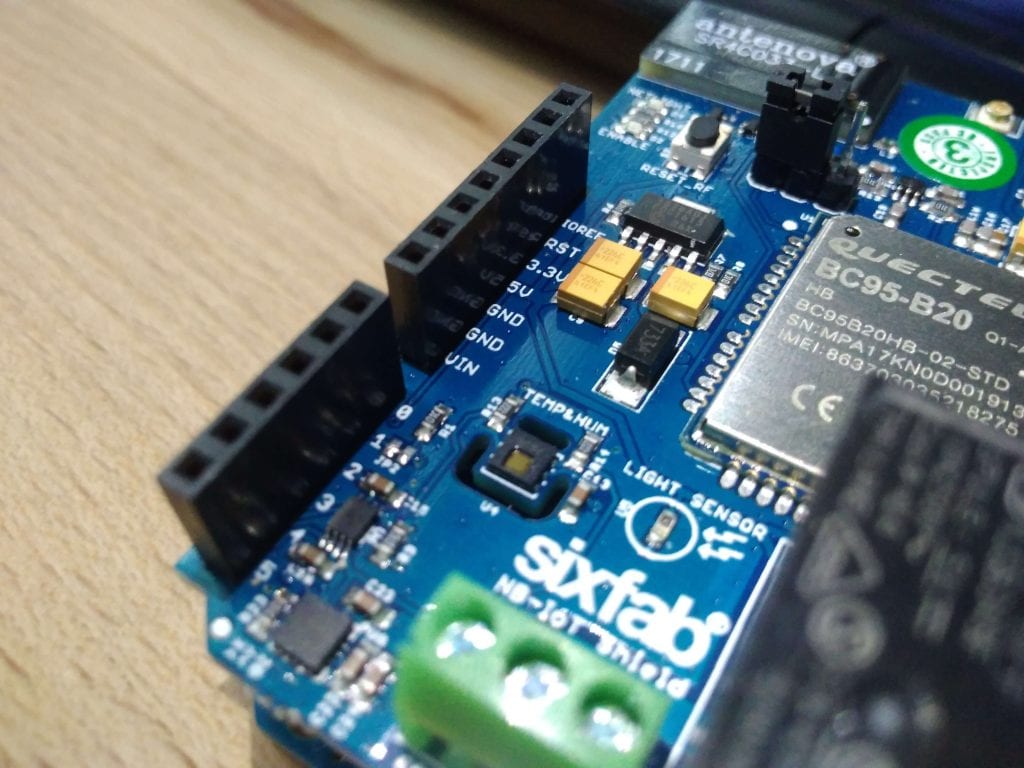


We are here again with our Sixfab Arduino NB-IoT Shield Tutorial. As you all know from the details of the product that there are built-in sensors, relay and USER led on the shield. So we will be showing you how to access all of them in this tutorial and sending the received data over local server (Note: Remote Server can be used too).
At this stage we are going to assume that you all have enough knowledge about coding Arduino. We also consider you have configured the local server setting; if not please follow our basic tutorial on Sixfab Arduino NB-IoT Shield.
1. Plug your shield to your Arduino. Plug your SIM and connect the Jumper connector for antenna.

2. Here we are going to use USB-TTL converter as earlier.
Let us again explain the reason again, the UART of the Arduino is already being used by BC95 module. So we will need another serial connection in order to observe our readings. Moreover to observe the data via our second serial we will need another serial monitor. We are going to use Serial Port Terminal in linux.(Windows user can use HERCULES SETUP).
The USB-TTL has 4 wires among them
VCC(5V, Red cable),
TX(Green cable),
RX(White cable) and
GND(Black Black).
There are also 4 M-M Jumper Cables so that you may connect to your shield.
The connection is to be made as following:
USB-TTL ↔ Sixfab Arduino NB-IoT Shield
5V ↔ NOT USED
GND ↔ GND
TX ↔ D10
RX ↔ D11
#Note: Power has been supplied from Arduino so we don’t have to connect VCC of the USB-TTL
3. Download all the required libraries for Sixfab_HDC1080 and Sixfab_MMA8452Q.
4. Now download intermediateTutorialNBIoT.ino and intermediateTutorialNBIoT.h and open them in your Arduino IDE.
Here you will need to make some changes in the intermediateTutorialNBIoT.h: local router IP and port, configure it according to your own information.
You can see following lines of code in intermediateTutorialNBIoT.h
#define ECHO_TEST
#define SENSOR_TEST
#define RELAY_TEST
#define ACCEL_TEST
#define USR_LED_TEST
Here it lets you activate your desired sensor/element of the shield and you can comment out the undesired ones.
5. Connect Arduino and USB-TTL to your laptop/desktop
6. Upload the sketch to your Arduino.
7. Now open Serial Port Terminal (HERCULES SETUP in Windows) and go to Configuration > Port settings.

8. Select your Port where your USB-TTL is connected (it’s ttyUSB0 in our case) and set Baud Rate to 9600.Then click OK.

Then you will be able to see the following screen

9. Now to listen data being sending over UDP port, open a terminal and run the following command
netcat -ul -p5000
where 5000 is our port number, so make sure you change it with your own port number. Windows user can HERCULES SETUP for this step.
Then you can observe the data package that has been sent over UDP.

Hence you are able to listen the Lux sensor, Temperature and Humidity sensor data that are being sent over UDP. For Relay and USER Led, you can observe it on the shield.
In our next tutorial we will be demonstrating how to access external sensor and transmit the data over local server using Sixfab Arduino NB-IoT Shield.