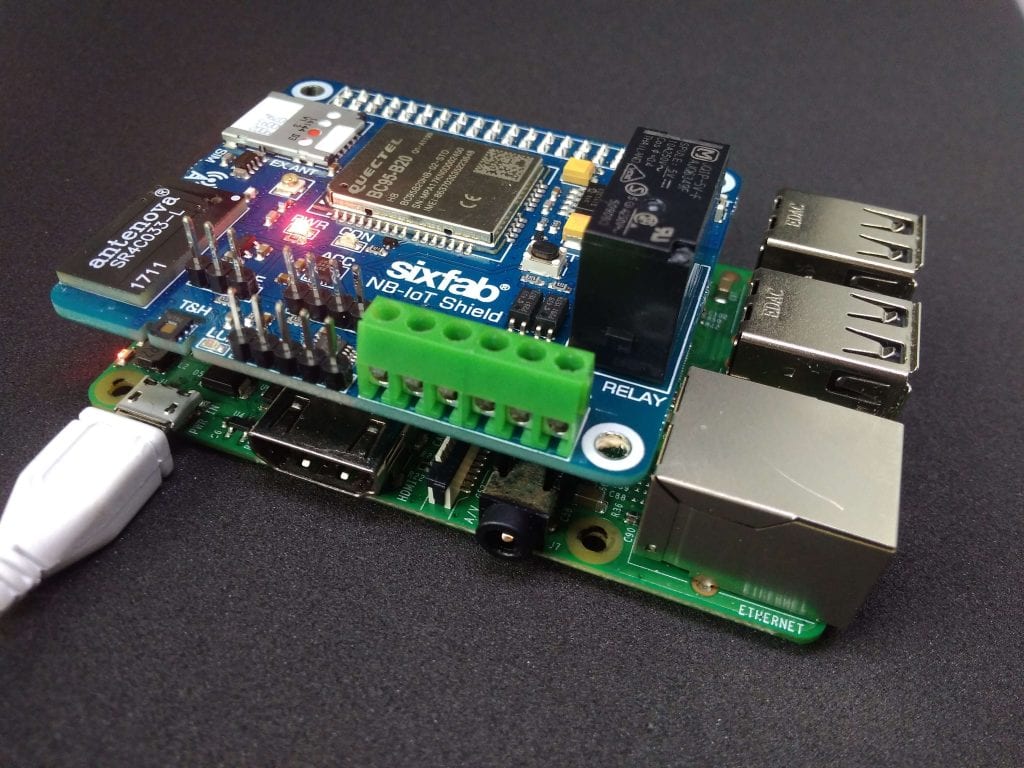


Sixfab Raspberry Pi NB-IoT shield is a narrow band IoT (NB-IoT) shield for Raspberry Pi. NB-IoT is very suitable for IoT applications with low power consumption. Shield also has the built-in 3-axis accelerometer, temperature, humidity, light sensors, optocoupler, and relay. If you like, you can also add your own sensors using the built-in 4 channel ADC.
Features
- LTE BC95 Nb-IoT Module B20 800MHz
- ADS1015 12 Bit 4 Channel ADC
- Relay with optocoupler protection (24V DC, 120-220V AC Switching)
- Optocoupler (3-12 V DC switching)- Built-in 3 axis accelerometer (MMA8452Q)
- Built-In HDC1080 temperature sensor (-40 +125 C)
- Built-In HDC1080 humidity sensor (0 100%)
- Built-In ALS-PT19 ambient light sensor()
- 1-Wire interface (3 male pins)(It can be used with DS18B20, DHT21 etc.)
- I2C interface (4 male pins)
- User button and LED
- Micro SIM Socket
- Built-in PCB Antenna
- UFL socket for external antenna
Warnings
Some of the mention-able applications are
- Smart farming
- Smart home sensor
- Smart door lock
- Security and asset tracking
- Home appliances
- Agricultural and environmental monitoring
Since it has been designed to consume minimum energy it doesn’t support TCP protocol but UDP protocol is supported. We can use UDP protocol over both local and remote server. Local server refers to your own machine while remote server is another machine/computer.
For this tutorial we will be observing how to set configurations for localhost and sending data over localhost UDP.
Login to you routers configurations, by going to 192.168.1.1(generally this is the address for router configurations, might change for some router) from your Internet browser and login with your own credentials.

Now scroll down at Basic Status page to find your IP address of your connection (which is mentioned as dsl_internet in our case). We will need it later.

Now click on Forwarding form the option list and then click Virtual Server.
Then click on Add New, which will take you to the following screen. Now fill up Service Port(as desired, in our case it is 5000), IP Address(It is IP Address of your Computer/Laptop. Check the note below if you don’t know how to obtain your IP Address) and select Protocol(as UDP). Click Save.
## Note: Open your terminal and run ifconfig command to obtain your IP Address. This is applicable for linux users. Windows user can type ipconfig in cmd command.
Now take your Sixfab Raspberry Pi NB-IoT shield and insert Sim card.

Plug the shield over your RaspberryPi.
Now open a terminal and connect to your Raspberry Pi via ssh. (Windows users can use putty).

Now you will need to enable Serial, I2C and 1-Wire. To do so get into your Raspberry Pi configuration tool by following command
sudo raspi-configHere you will see a blue screen with gray box at the center.

Goto Interfacing Option and enable Serial, I2C and 1-Wire.
After enabling all of them, reboot your raspberry pi.
Once reboot run the following commands to update system’s package
sudo apt-get updateNext, upgrade all of the installed packages to latest version by
sudo apt-get upgradeNow the getty service needs to be stopped on Raspbian. Getty manages a terminal line and it protects the system from unauthorized access. By default GPIO14 and GPIO15 of Raspberry Pi are active as console. So it need to be disabled as serial console is not being used. Moreover the service of serial console is to be deleted from cmdline.txt. Run the following commands (terminal is connected to /dev/ttyS0 in this case)
sudo systemctl stop serial[email protected]
sudo systemctl disable serial[email protected]As for previous versions Raspberry Pi terminal is connected to /dev/AMA0, following commands should be used instead.
11. Now console has to be removed from the cmdline.txt. This can be done by running following command
sudo nano /boot/cmdline.txtand removing ”console=serial0, 115200” or ”console=ttyAMA0, 115200” for Raspberry Pi other than version 3. Exit editor saving the changes. Then reboot your Raspberry Pi.

Enable UART is by adding ”enable_uart=1” at the end of /boot/config.txt which can be obtained by following command
sudo nano /boot/config.txtClone sixfabNBiotTutorials repository to your Raspberry Pi by
git clone https://github.com/sixfab/RPI-NB-IoT-Shield.gitGet into the cloned directory
cd RPI-NB-IoT-Shield/examplesHere you can observe the script gettingStartedNBIoT.py
Find the following line
ip = “XX.XX.XX.XX”
port = “XXXX”
and replace XX.XX.XX.XX with your router’s ip and XXXX with your port number and save it.
Run the script by typing
python gettingStartedNBIoT.pyHere we are sending a string data over local server.

To listen the data that are being sent over the local server open another terminal and run the following command
netcat -ul -p5000where 5000 is our port number, so make sure you change it with your own port number.
Hence you are able to listen the data that are being sent over UDP.


