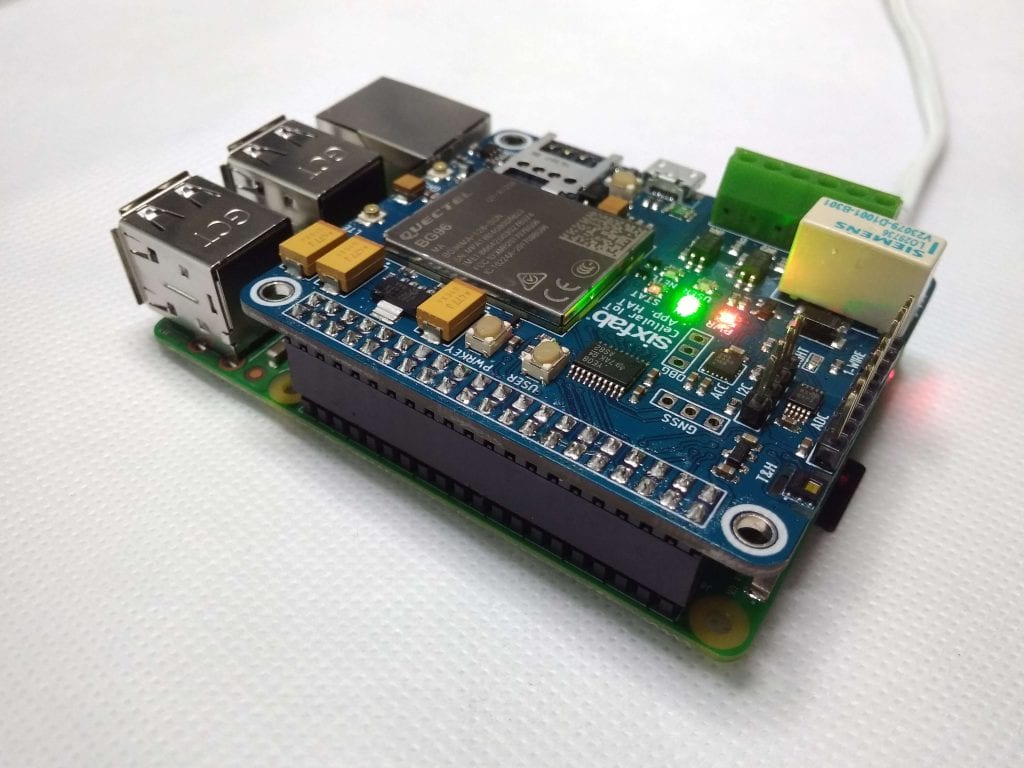


Sixfab is launching their new shield for Raspberry Pi named as Sixfab Raspberry Pi Cellular IoT Application Shield. The Shield uses Quectel BG96 module which gives this shield combined feature of LTE technologies Cat.M1, Cat.NB1 and eGPRS for your Raspberry Pi.
Please visit the product page for detailed feature
The Shield also contains built-in temperature, humidity, light sensors, 3-axis accelerometer and relay
Since this is our first tutorial on this Shield. Here we will be observing all built-in sensors and control relay.
What we need:
- Raspberry Pi,
- Sixfab Raspberry Pi Cellular IoT Application Shield.
1. Attach the Shield to your Raspberry Pi and turn ON your Raspberry Pi. Make sure your I2C and Serial interfaces are enabled from raspi-config.
2. Clone our GitHub Repo to your Raspberry Pi.
git clone https://github.com/sixfab/Sixfab_RPi_CellularIoT_App_Shield.git

3. Once the repo is cloned get into the Sixfab_Rpi_CellularIoT_Library
cd Sixfab_Rpi_CellularIoT_Library

4. Now install the library by
sudo python3 setup.py install

The library is written with python3 so we will be writing and running every script in python3.
*** Alternate method of installing the library is using pip3. Simply run the following command.
sudo pip3 install sixfab-cellulariot
once after installation, you will need the scripts from github repo.
5. Once it is installed you may get into sample directory where you will find examples for the shield.
cd sample

6. For this tutorial, we will run sensor_test.py
python3 sensor_test.py

In this way, you will get data from all available sensors on the Shield. Now we will examine the code.
from cellulariot import cellulariot
import time

node = cellulariot.CellularIoTApp()

node.disable()
node.enable()

time.sleep(0.5)
print("Acceleration: "+str(node.readAccel()))
time.sleep(0.5)
print("Humidity: " + str(node.readHum()))
time.sleep(0.5)
print("Temperature: " + str(node.readTemp()))
time.sleep(0.5)
print("Lux: " + str(node.readLux()))
print("ADC1: " + str(node.readAdc(0)))
time.sleep(0.5)
print("ADC2: " + str(node.readAdc(1)))
time.sleep(0.5)
print("ADC3: " + str(node.readAdc(2)))
time.sleep(0.5)
print("ADC4: " + str(node.readAdc(3)))
time.sleep(0.5)
node.turnOnRelay()
time.sleep(2)
node.turnOffRelay()
time.sleep(0.5)
node.turnOnUserLED()
time.sleep(2)
node.turnOffUserLED()- LINE 1: imports the cellulariot class from cellulariot Library
- LINE 2: imports time library
- LINE 4: declares node as an object
- LINE 6: Disables the module
- LINE 7: Re-enables the module
- LINE 9: idle for 0.5 seconds
- LINE 10: readAccel() returns the accelerometer value
- LINE 12: readHum() returns the Humidity
- LINE 14: readTemp() returns temperature
- LINE 16: readLux() returns lux in percentage
- LINE 17-23: returns ADC values
- LINE 25/27: turns ON/OFF the Relay
- LINE 29/31: Switch ON/OFF the USER led
In the next tutorial, we will show sending data over UDP.